Profiling#
Profiling is one of the most important debugging tools to diagnose performance, out of memory, hanging, or other application issues. Here is a list of common profiling tools you may use when debugging Ray applications.
CPU profiling
py-spy
Memory profiling
memray
GPU profiling
PyTorch Profiler
Nsight System
TPU profiling
JAX Profiler
Ray Task / Actor timeline
If Ray doesn’t work with certain profiling tools, try running them without Ray to debug the issues.
Enabling dashboard profiling#
The Ray dashboard’s built-in profiling features (CPU flame graphs, stack traces, and memory profiling) are disabled by default for security reasons. These endpoints trigger profiling work on Ray workers on demand and return the results. On deployments where the dashboard is exposed without authentication, a malicious web page could exploit DNS rebinding to reach these endpoints from a browser.
To enable dashboard profiling, set the following environment variable on the Ray head node before starting Ray:
export RAY_DASHBOARD_ENABLE_PROFILING=1
Warning
If your dashboard is accessible over a network without authentication, enabling profiling exposes side-effecting endpoints to potential abuse. Enable token authentication when using profiling on an exposed dashboard.
Configuring profiling defaults#
Stack trace, CPU flame graph, and memory profile requests each accept several parameters. When a request omits a parameter, its value falls back to a cluster-wide default. Set the following environment variables on the Ray head node to change those defaults. An explicit query parameter always takes precedence.
Environment variable |
Meaning |
Default |
|---|---|---|
|
Include native (C/C++) stack frames. Adds significant overhead. Only takes effect on Linux for stack traces and CPU profiling. Memory profiling honors it on every platform memray supports. |
|
|
Also profile child processes of the target (stack trace and CPU profiling). |
|
|
Include off-CPU or sleeping threads (CPU profiling only). |
|
|
Report memory leaks instead of peak usage (memory profiling only). |
|
|
Record |
|
|
Duration in seconds for CPU profiling (clamped to |
|
|
Duration in seconds for memory profiling (clamped to |
|
|
Maximum accepted profiling |
|
|
Output format for CPU profiling. One of |
|
|
Output format for memory profiling. One of |
|
For example, to make native frames the default for stack traces across the cluster, set RAY_DASHBOARD_PROFILING_NATIVE_DEFAULT=1 on the head node. Enable it only when sampling the Python layer alone isn’t enough, because native frames significantly increase profiling overhead.
CPU profiling#
Profile the CPU usage for Driver and Worker processes. This helps you understand the CPU usage by different processes and debug unexpectedly high or low usage.
py-spy#
py-spy is a sampling profiler for Python programs. Ray dashboard has native integration with pyspy:
It lets you visualize what your Python program is spending time on without restarting the program or modifying the code in any way.
It dumps the stacktrace of the running process so that you can see what the process is doing at a certain time. It is useful when programs hangs.
Note
You may run into permission errors when using py-spy in the docker containers. To fix the issue:
if you start Ray manually in a Docker container, follow the
py-spy documentation_ to resolve it.if you are a KubeRay user, follow the guide to configure KubeRay and resolve it.
Here are the steps to use py-spy with Ray and Ray dashboard.
cProfile#
cProfile is Python’s native profiling module to profile the performance of your Ray application.
Here are the steps to use cProfile.
Memory profiling#
Profile the memory usage for Driver and Worker processes. This helps you analyze memory allocations in applications, trace memory leaks, and debug high/low memory or out of memory issues.
memray#
memray is a memory profiler for Python. It can track memory allocations in Python code, in native extension modules, and in the Python interpreter itself.
Here are the steps to profile the memory usage of Ray Tasks and Actors.
Ray dashboard view#
You can now do memory profiling for Ray Driver or Worker processes in the Ray dashboard, by clicking on the “Memory profiling” actions for active Worker processes, Tasks, Actors, and a Job’s driver process.
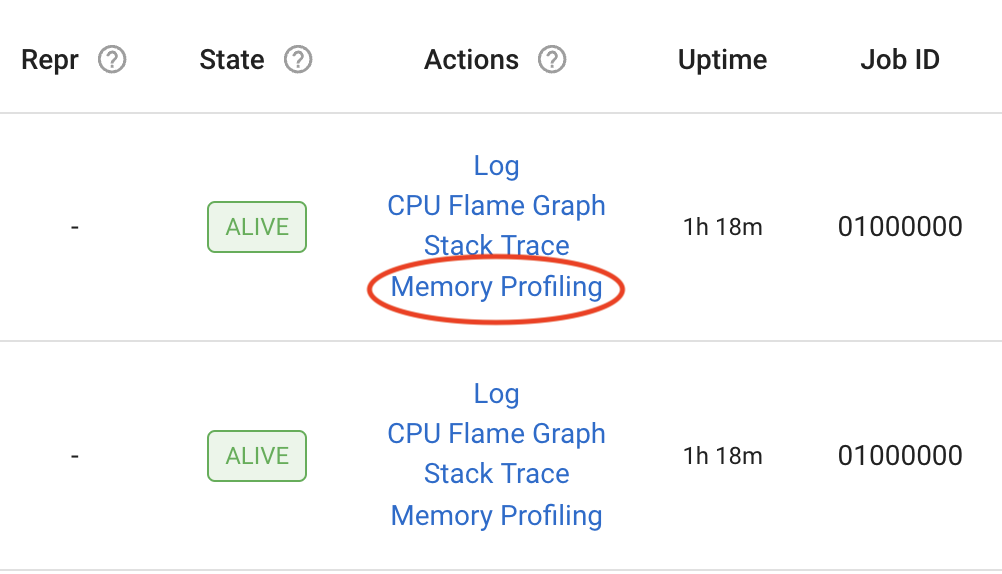
Additionally, you can specify the following profiling Memray parameters from the dashboard view:
Format: Format of the profiling result. The value is either “flamegraph” or “table”
Duration: Duration to track for (in seconds)
Leaks: Enables the Memory Leaks View, which displays memory that Ray didn’t deallocate, instead of peak memory usage
Natives: Track native (C/C++) stack frames (only supported in Linux)
Python Allocator Tracing: Record allocations made by the pymalloc allocator
GPU profiling#
GPU and GRAM profiling for your GPU workloads like distributed training. This helps you analyze performance and debug memory issues.
PyTorch profiler is supported out of box when used with Ray Train
NVIDIA Nsight System is natively supported on Ray.
PyTorch Profiler#
PyTorch Profiler is a tool that allows the collection of performance metrics (especially GPU metrics) during training and inference.
Here are the steps to use PyTorch Profiler with Ray Train or Ray Data.
Nsight System Profiler#
Installation#
First, install the Nsight System CLI by following the Nsight User Guide.
Confirm that you installed Nsight correctly:
$ nsys --version

# NVIDIA Nsight Systems version 2022.4.1.21-0db2c85
Run Nsight on Ray#
To enable GPU profiling, specify the config in the runtime_env as follows:
import torch
import ray

ray.init()

@ray.remote(num_gpus=1, runtime_env={ "nsight": "default"})
class RayActor:
    def run(self):
        a = torch.tensor([1.0, 2.0, 3.0]).cuda()
        b = torch.tensor([4.0, 5.0, 6.0]).cuda()
        c = a * b

        print("Result on GPU:", c)

ray_actor = RayActor.remote()
# The Actor or Task process runs with : "nsys profile [default options] ..."
ray.get(ray_actor.run.remote())
You can find the "default" config in nsight.py.
Custom options#
You can also add custom options for Nsight System Profiler by specifying a dictionary of option values, which overwrites the default config, however, Ray preserves the --output option of the default config.
import torch
import ray

ray.init()

@ray.remote(
num_gpus=1,
runtime_env={ "nsight": {
    "t": "cuda,cudnn,cublas",
    "cuda-memory-usage": "true",
    "cuda-graph-trace": "graph",
}})
class RayActor:
    def run(self):
        a = torch.tensor([1.0, 2.0, 3.0]).cuda()
        b = torch.tensor([4.0, 5.0, 6.0]).cuda()
        c = a * b

        print("Result on GPU:", c)

ray_actor = RayActor.remote()

# The Actor or Task process runs with :
# "nsys profile -t cuda,cudnn,cublas --cuda-memory-usage=True --cuda-graph-trace=graph ..."
ray.get(ray_actor.run.remote())
Note:: The default report filename (-o, --output) is worker_process_{pid}.nsys-rep in the logs dir.
Profiling result#
Find profiling results under the /tmp/ray/session_*/logs/{profiler_name} directory. This specific directory location may change in the future. You can download the profiling reports from the Ray dashboard.
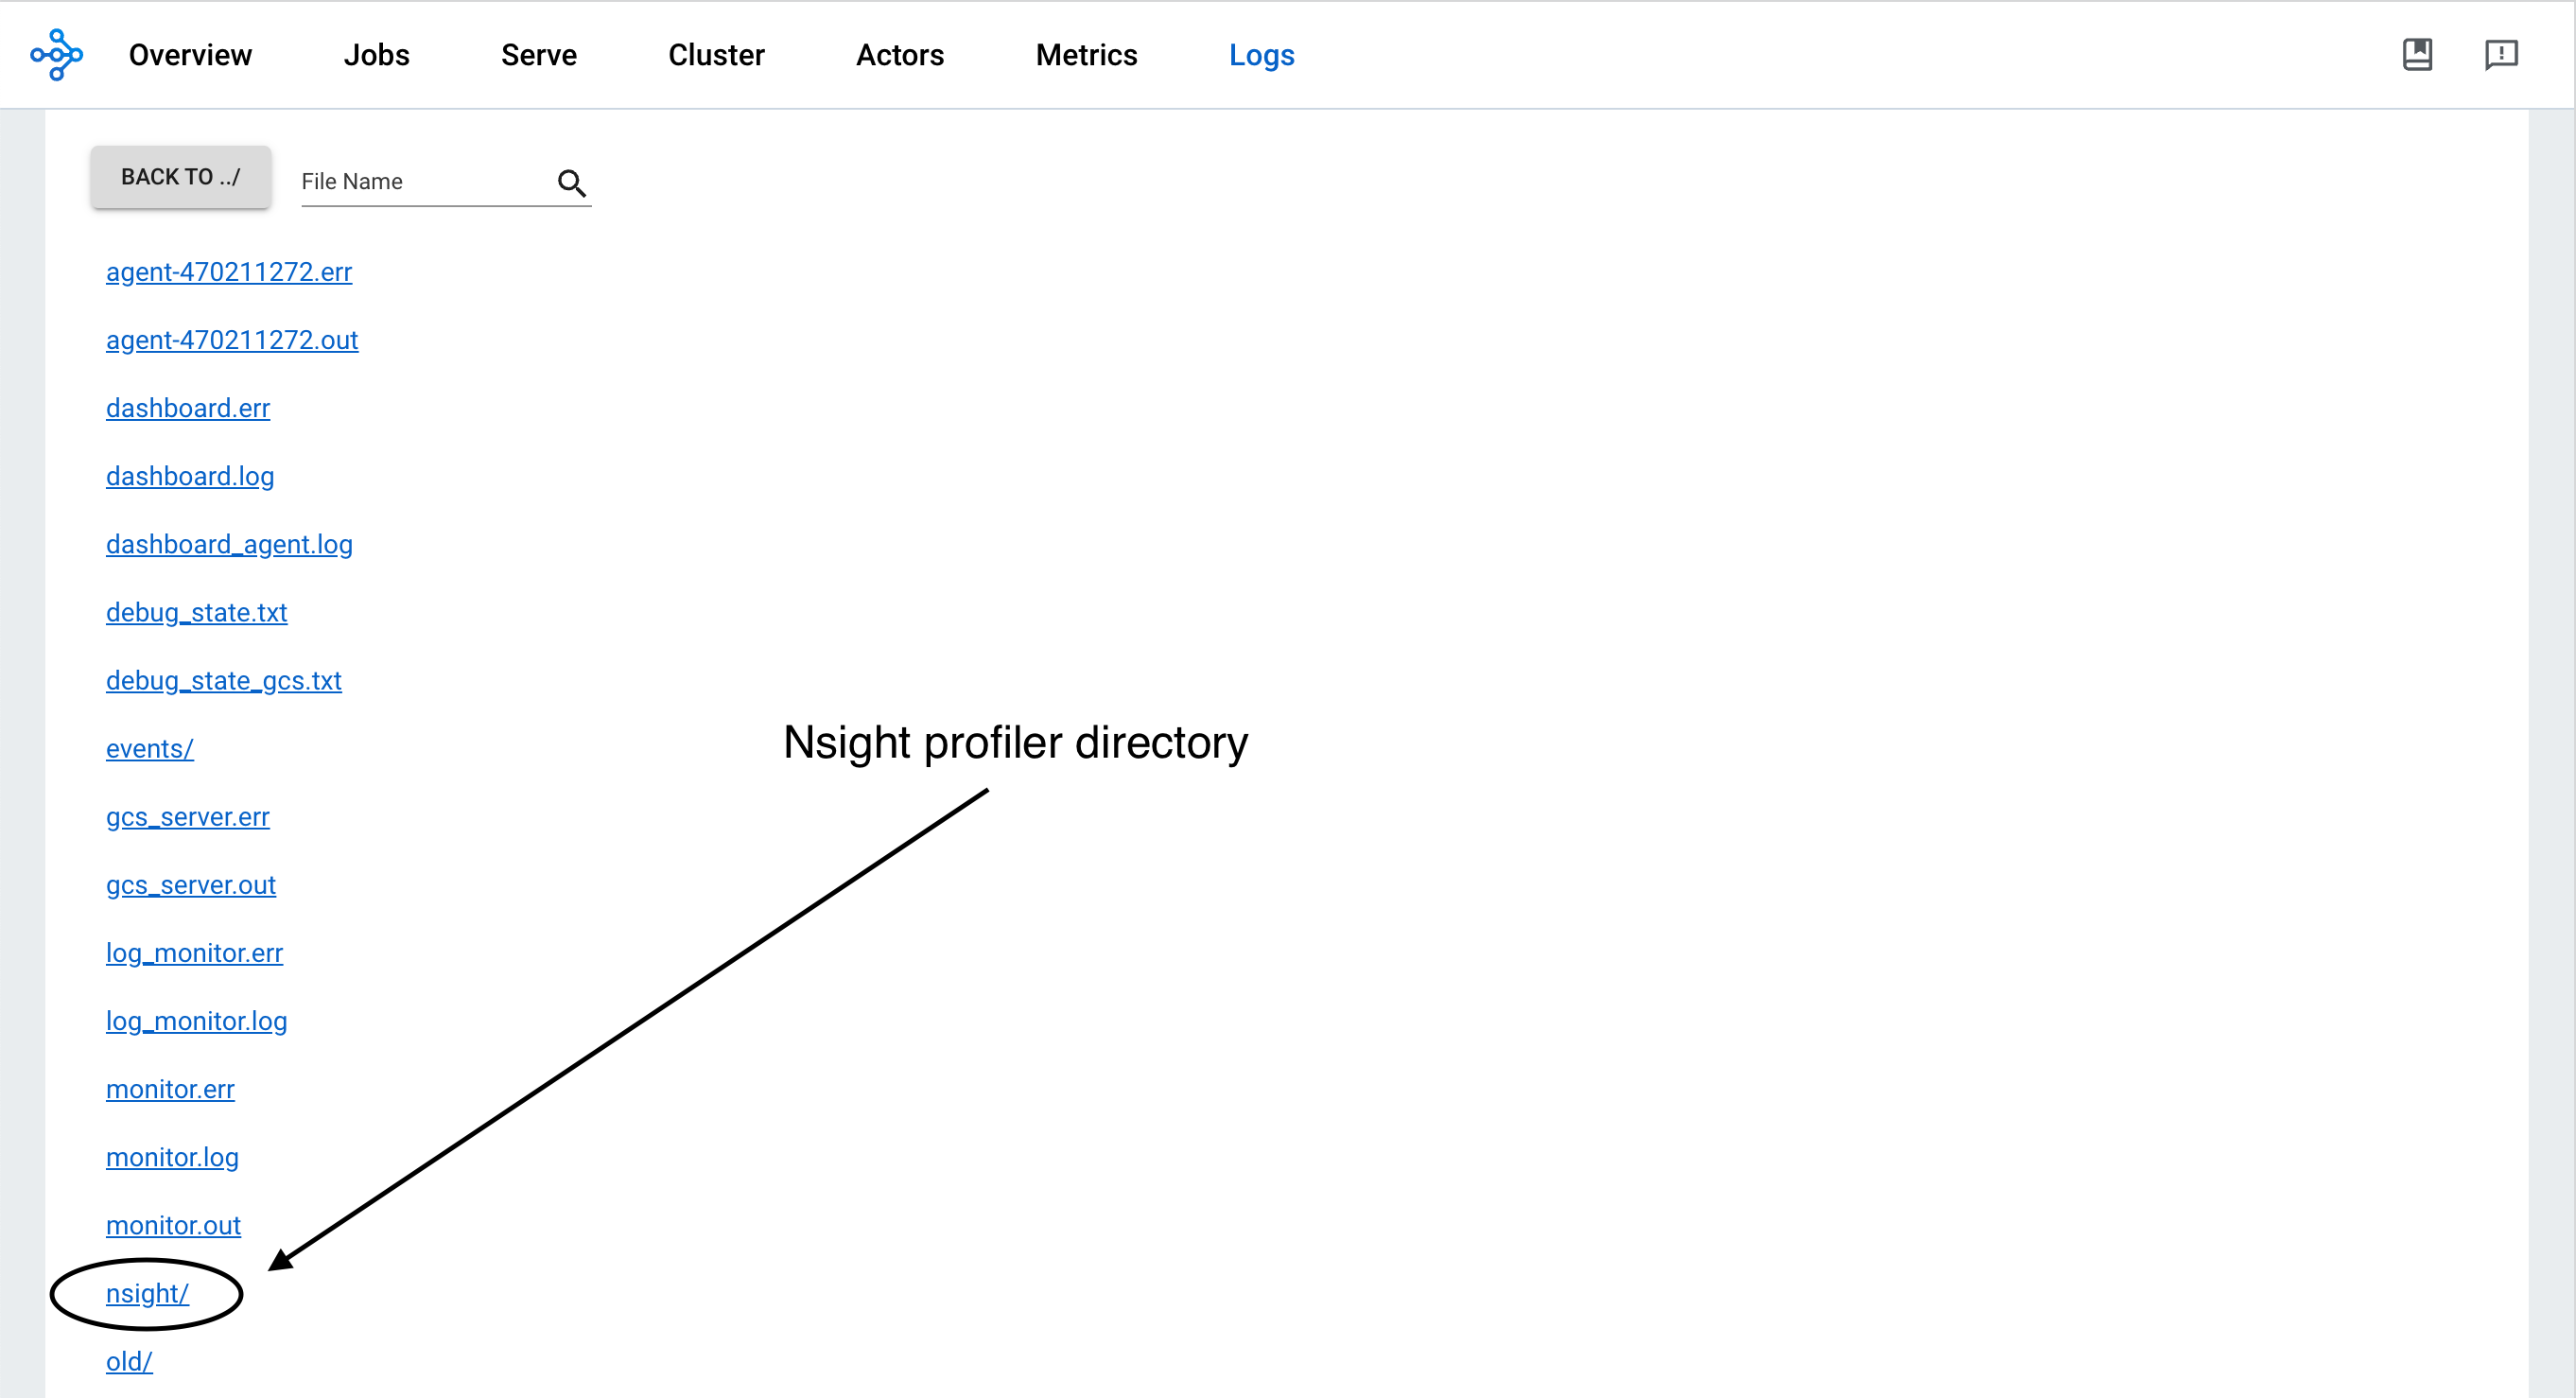
To visualize the results, install the Nsight System GUI on your laptop, which becomes the host. Transfer the .nsys-rep file to your host and open it using the GUI. You can now view the visual profiling info.
Note: The Nsight System Profiler output (-o, –output) option allows you to set the path to a filename. Ray uses the logs directory as the base and appends the output option to it. For example:
--output job_name/ray_worker -> /tmp/ray/session_*/logs/nsight/job_name/ray_worker

--output /Users/Desktop/job_name/ray_worker -> /Users/Desktop/job_name/ray_worker
The best practice is to only specify the filename in output option.
TPU profiling#
Profile TPU workloads with the JAX profiler. Trigger a JAX profile dynamically through the Ray dashboard, then view the trace in TensorBoard. For the full walkthrough on Kubernetes, see JAX profiler for Ray on Kubernetes.
Ray Task or Actor timeline#
Ray Timeline profiles the execution time of Ray Tasks and Actors. This helps you analyze performance, identify the stragglers, and understand the distribution of workloads.
Open your Ray Job in Ray dashboard and follow the instructions to download and visualize the trace files generated by Ray Timeline.