Serve a Large Language Model using Ray Serve LLM on Kubernetes#
This guide provides a step-by-step guide for deploying a Large Language Model (LLM) using Ray Serve LLM on Kubernetes. Leveraging KubeRay, Ray Serve, and vLLM, this guide deploys the Qwen/Qwen2.5-7B-Instruct model from Hugging Face, enabling scalable, efficient, and OpenAI-compatible LLM serving within a Kubernetes environment. See Serving LLMs for information on Ray Serve LLM.
Prerequisites#
This example downloads model weights from the Qwen/Qwen2.5-7B-Instruct Hugging Face repository. To completely finish this guide, you must fulfill the following requirements:
A Hugging Face account and a Hugging Face access token with read access to gated repositories.
In your RayService custom resource, set the
HUGGING_FACE_HUB_TOKENenvironment variable to the Hugging Face token to enable model downloads.A Kubernetes cluster with GPUs.
Step 1: Create a Kubernetes cluster with GPUs#
Refer to the Kubernetes cluster setup instructions for guides on creating a Kubernetes cluster.
Step 2: Install the KubeRay operator#
Install the most recent stable KubeRay operator from the Helm repository by following Deploy a KubeRay operator. The Kubernetes NoSchedule taint in the example config prevents the KubeRay operator pod from running on a GPU node.
Step 3: Create a Kubernetes Secret containing your Hugging Face access token#
For additional security, instead of passing the HF access token directly as an environment variable, create a Kubernetes secret containing your Hugging Face access token. Download the Ray Serve LLM service config .yaml file using the following command:
curl -o ray-service.llm-serve.yaml https://raw.githubusercontent.com/ray-project/kuberay/master/ray-operator/config/samples/ray-service.llm-serve.yaml
After downloading, update the value for hf_token to your private access token in the Secret.
apiVersion: v1
kind: Secret
metadata:
  name: hf-token
type: Opaque
stringData:
  hf_token: <your-hf-access-token-value>
Step 4: Deploy a RayService#
After adding the Hugging Face access token, create a RayService custom resource using the config file:
kubectl apply -f ray-service.llm-serve.yaml
This step sets up a custom Ray Serve app to serve the Qwen/Qwen2.5-7B-Instruct model, creating an OpenAI-compatible server. You can inspect and modify the serveConfigV2 section in the YAML file to learn more about the Serve app:
serveConfigV2: |
  applications:
  - name: llms
    import_path: ray.serve.llm:build_openai_app
    route_prefix: "/"
    args:
      llm_configs:
      - model_loading_config:
          model_id: qwen2.5-7b-instruct
          model_source: Qwen/Qwen2.5-7B-Instruct
        engine_kwargs:
          dtype: bfloat16
          max_model_len: 1024
          device: auto
          gpu_memory_utilization: 0.75
        deployment_config:
          autoscaling_config:
            min_replicas: 1
            max_replicas: 4
            target_ongoing_requests: 64
          max_ongoing_requests: 128
In particular, this configuration loads the model from Qwen/Qwen2.5-7B-Instruct and sets its model_id to qwen2.5-7b-instruct. The LLMDeployment initializes the underlying LLM engine using the engine_kwargs field. The deployment_config section sets the desired number of engine replicas. By default, each replica requires one GPU. See Serving LLMs and the Ray Serve config documentation for more information.
Wait for the RayService resource to become healthy. You can confirm its status by running the following command:
kubectl get rayservice ray-serve-llm -o yaml
After a few minutes, the result should be similar to the following:
status:
  activeServiceStatus:
    applicationStatuses:
      llms:
        serveDeploymentStatuses:
          LLMDeployment:qwen2_5-7b-instruct:
            status: HEALTHY
          LLMRouter:
            status: HEALTHY
        status: RUNNING
Step 5: Send a request#
To send requests to the Ray Serve deployment, port-forward port 8000 from the Serve app service:
kubectl port-forward ray-serve-llm-serve-svc 8000
Note that this Kubernetes service comes up only after Ray Serve apps are running and ready.
Test the service with the following command:
curl --location 'http://localhost:8000/v1/chat/completions' --header 'Content-Type: application/json'
  --data '{
      "model": "qwen2.5-7b-instruct",
      "messages": [
          {
              "role": "system",
              "content": "You are a helpful assistant."
          },
          {
              "role": "user",
              "content": "Provide steps to serve an LLM using Ray Serve."
          }
      ]
  }'
The output should be in the following format:
{
  "id": "qwen2.5-7b-instruct-550d3fd491890a7e7bca74e544d3479e",
  "object": "chat.completion",
  "created": 1746595284,
  "model": "qwen2.5-7b-instruct",
  "choices": [
      {
          "index": 0,
          "message": {
              "role": "assistant",
              "reasoning_content": null,
              "content": "Sure! Ray Serve is a library built on top of Ray...",
              "tool_calls": []
          },
          "logprobs": null,
          "finish_reason": "stop",
          "stop_reason": null
      }
  ],
  "usage": {
      "prompt_tokens": 30,
      "total_tokens": 818,
      "completion_tokens": 788,
      "prompt_tokens_details": null
  },
  "prompt_logprobs": null
}
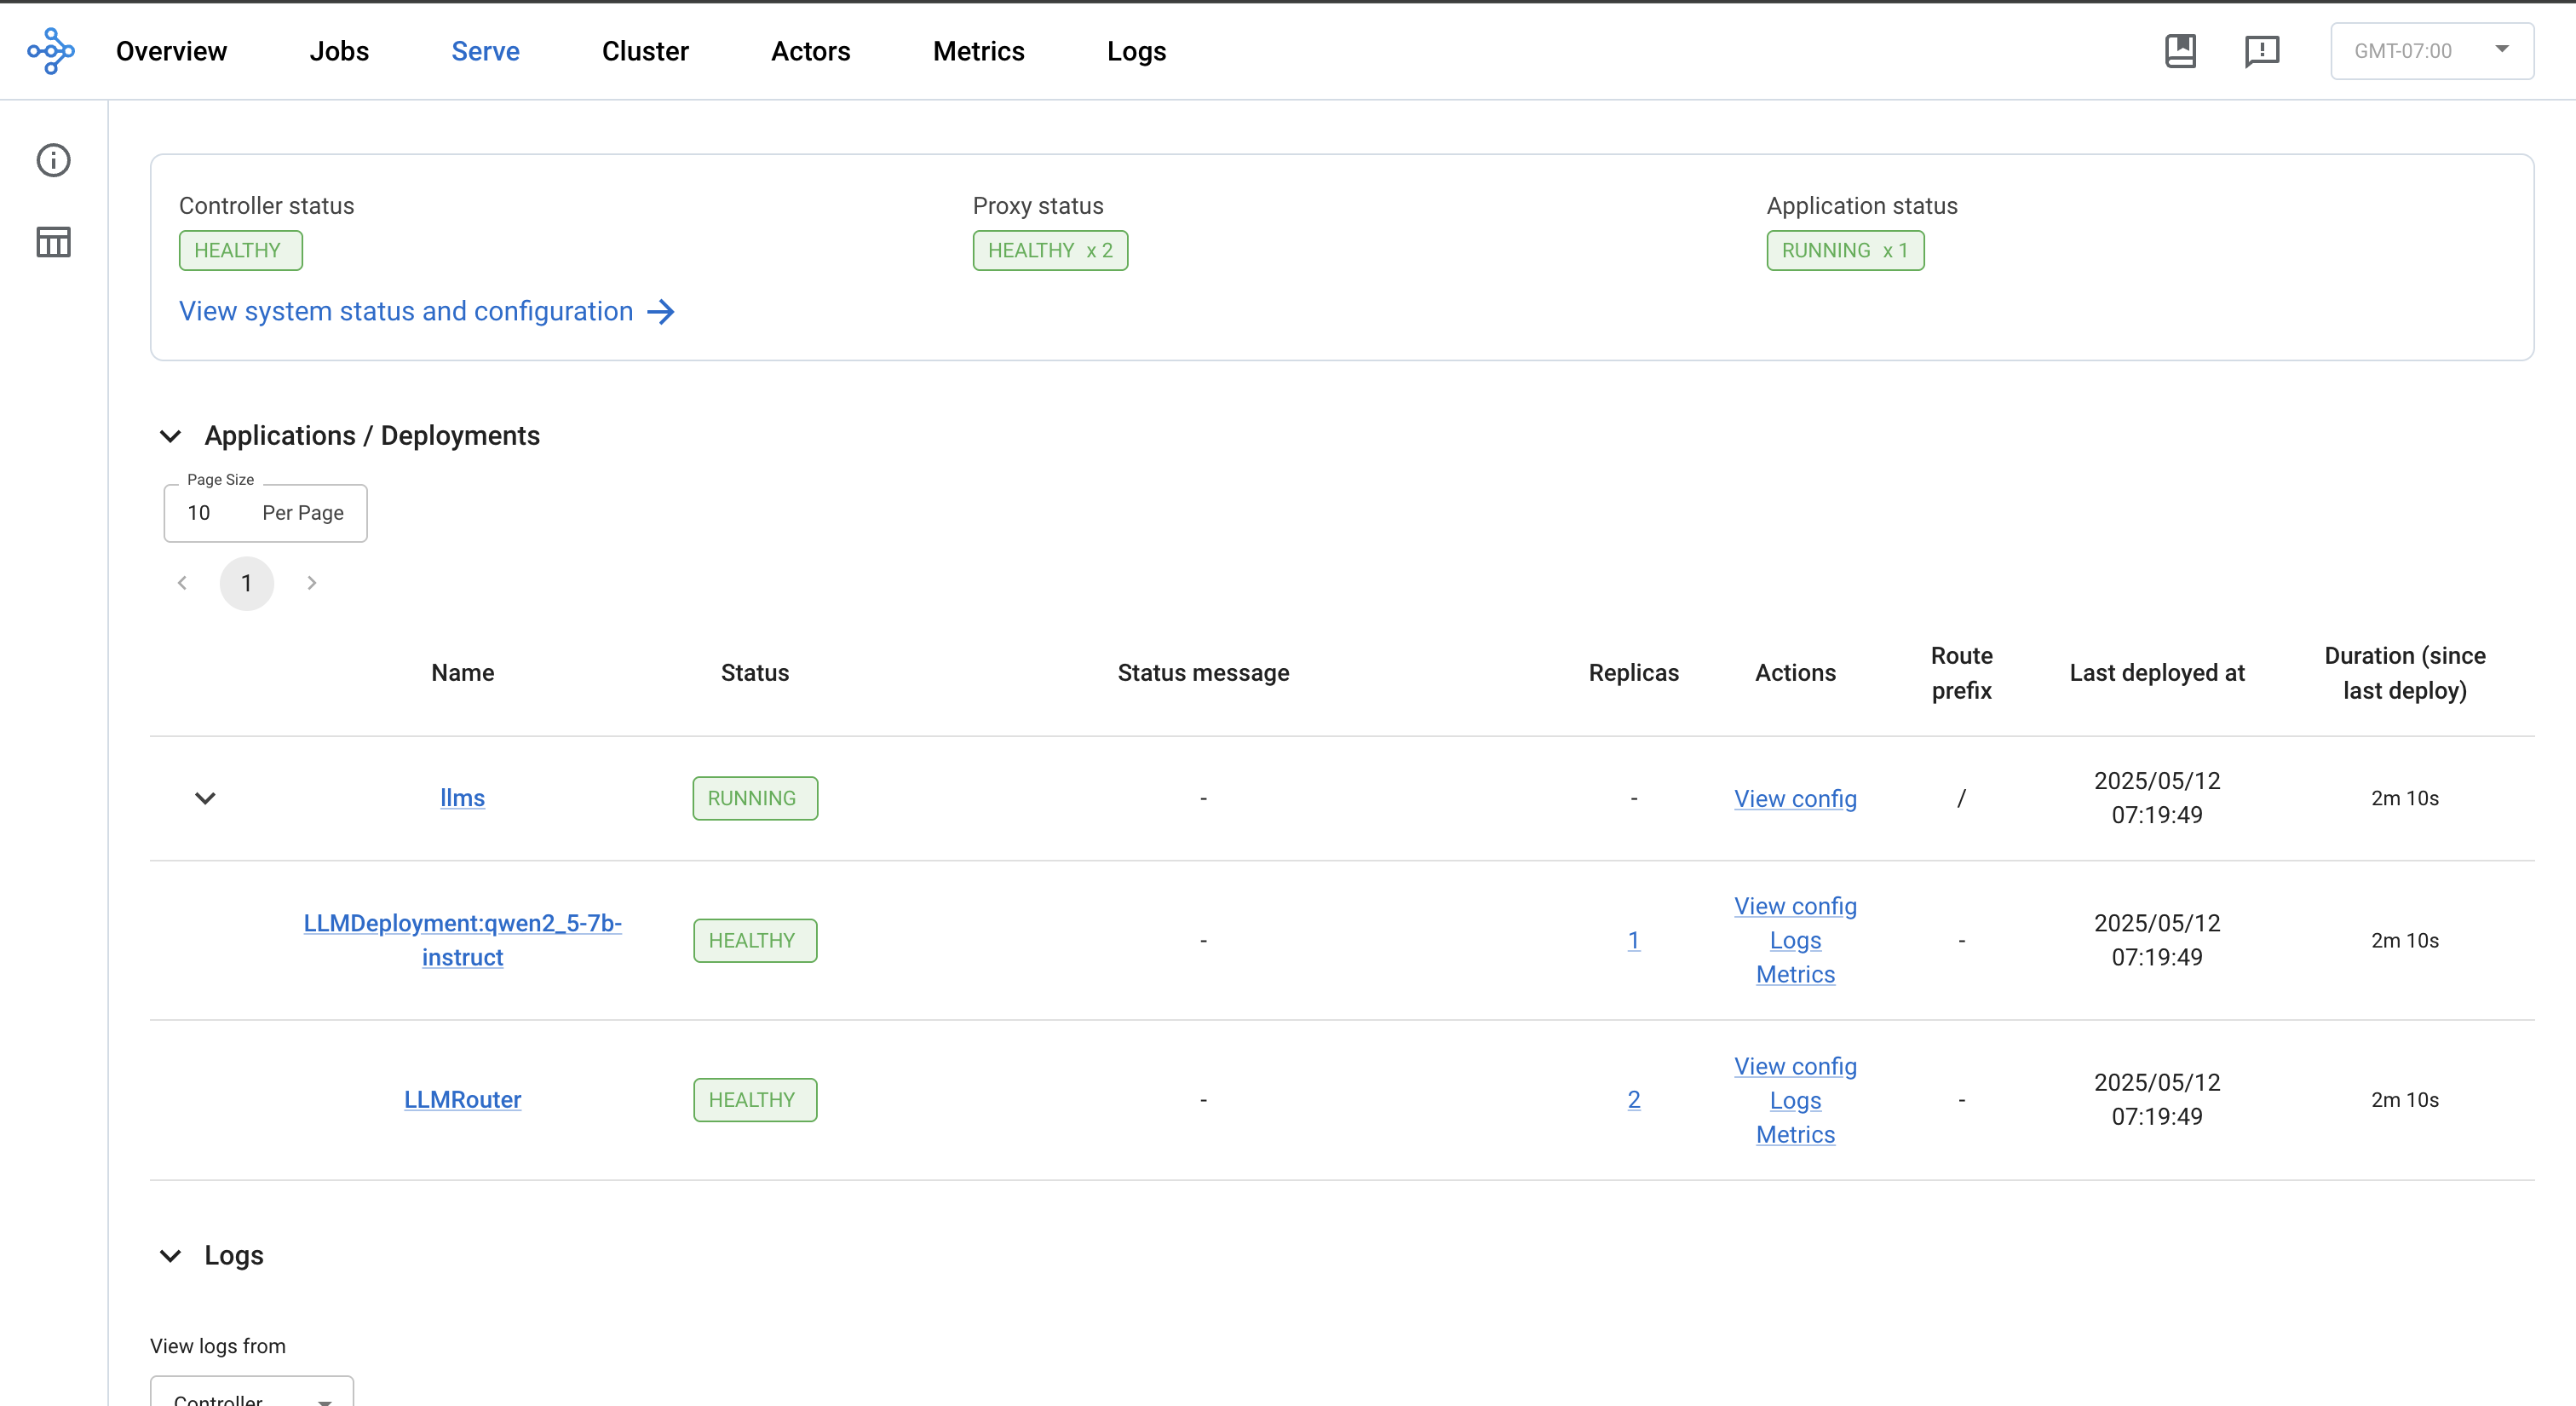
Step 6: View the Ray dashboard#
kubectl port-forward svc/ray-serve-llm-head-svc 8265
Once forwarded, navigate to the Serve tab on the dashboard to review application status, deployments, routers, logs, and other relevant features.