JAX profiler for Ray on Kubernetes#
This guide explains how to profile JAX workloads running on Ray TPU workers in a Kubernetes cluster.
Prerequisites and image setup#
To profile JAX workloads on TPU workers, make sure your environment meets the following requirements:
Use a Ray Docker image with Ray 2.57 or later, or a custom image built with JAX profiler support. The image needs
jax,tensorflow,tensorboard, andtensorboard-plugin-profileinstalled in the container’s base Python environment. The Ray dashboardReporterAgentusestensorflowon worker nodes to capture JAX profiles.Note
This feature doesn’t support installing
tensorflowdynamically withruntime_env.Set the environment variable
RAY_DASHBOARD_ENABLE_PROFILING=1on the Ray head node container in your KubeRayRayJoborRayClusterYAML specification. The Ray dashboard profiling endpoints are disabled by default for security reasons.
Initialize the JAX profiler in user code#
In your remote Ray task or actor executing JAX code on the TPU worker, call init_jax_profiler() after importing Ray. This call starts an in-process gRPC profiling server inside the worker process, on port 9999 by default. The call also registers the port in the Ray GCS internal key-value store so the Ray dashboard can discover it:
import ray
from ray.util.tpu import init_jax_profiler

ray.init()

@ray.remote(resources={"TPU": 4})
def train_step():
    # Initialize the in-process JAX profiler server and register it with the Ray GCS.
    init_jax_profiler()

    # Add your JAX training and XLA execution code here.
Note
init_jax_profiler() listens on port 9999 by default and assumes at most one JAX worker process per host, which is the standard topology for multi-host TPU VM training.
Deploy a KubeRay RayJob#
Deploy a TPU training RayJob using the sample configuration from the ray-project/kuberay repository:
# Clean up any previously deployed job with the same name:
kubectl delete -f https://raw.githubusercontent.com/ray-project/kuberay/master/ray-operator/config/samples/ray-job.tpu-jax.yaml --ignore-not-found

# Apply the RayJob specification:
kubectl apply -f https://raw.githubusercontent.com/ray-project/kuberay/master/ray-operator/config/samples/ray-job.tpu-jax.yaml
If you use your own RayJob manifest, set RAY_DASHBOARD_ENABLE_PROFILING to "1" on the head pod container so the Ray dashboard profiling endpoints are reachable:
# Under headGroupSpec.template.spec.containers:
- name: ray-head
  env:
    - name: RAY_DASHBOARD_ENABLE_PROFILING
      value: "1"
Wait for pods to start#
Check that all head and worker pods are running:
kubectl get pods -w
The output lists a head pod named <RAY_JOB_NAME>-head-... and a TPU worker pod named <RAY_JOB_NAME>-worker-.... Both reach the Running state.
Port-forward the Ray dashboard#
Expose the Ray dashboard port on the head node locally so you can call the API endpoints:
kubectl port-forward svc/<RAY_JOB_NAME>-head-svc 8265:8265
Keep this port-forwarding process running in a dedicated shell session.
Locate target worker PID and node ID#
To trigger profiling dynamically, identify the worker node ID or IP address and the running worker process PID.
Get the node ID#
Query the Ray State API from your local terminal through the port-forwarded Ray dashboard:
RAY_ADDRESS=http://localhost:8265 ray list nodes --detail
Alternatively, open the Ray dashboard in your browser at http://localhost:8265 and copy the hexadecimal node ID from the Cluster nodes view.
Get the worker process PID#
You can find the PID of the Python worker process executing your JAX task or actor in two ways:
Open the Ray dashboard at
http://localhost:8265and go to the Workers, Tasks, or Actors tab to view the PID and node ID.Alternatively, use the Ray State CLI:
RAY_ADDRESS=http://localhost:8265 ray list workers --detail
Trigger JAX profiling dynamically#
Open a new terminal window and run the following curl command to trigger JAX profiling through the Ray dashboard. Replace <WORKER_PID> and <NODE_ID_HEX> with the values you resolved:
curl -G "http://localhost:8265/worker/jax_profile" \
  --data-urlencode "pid=<WORKER_PID>" \
  --data-urlencode "node_id=<NODE_ID_HEX>" \
  --data-urlencode "duration=5"
You can pass ip=<WORKER_IP> instead of node_id=<NODE_ID_HEX>. The Ray dashboard discovers the profiler port from the GCS registry, including a custom port that you passed to init_jax_profiler() or set through the JAX_PROFILER_PORT environment variable. Pass port=<PORT> only to bypass that lookup, or when the endpoint reports that it couldn’t discover the port.
Expected endpoint response#
The Ray dashboard looks up the JAX profiler port in the GCS registry, queries the TPU worker’s in-process profiling server, collects the trace, and returns the following:
{
  "result": true,
  "msg": "JAX profiling finished.",
  "data": {
    "traceDirectory": "profiles"
  }
}
Verify trace outputs#
Confirm that the profiler captured the JAX trace file and saved it to the local filesystem of the TPU worker pod that ran your JAX workload. Replace <TPU_WORKER_POD> with the name of the worker pod that ran the task:
kubectl exec -it <TPU_WORKER_POD> -c ray-worker -- ls -la /tmp/ray/session_latest/logs/profiles
Tip
If your cluster has only a single worker pod, retrieve its name with kubectl get pods -l ray.io/node-type=worker -o jsonpath='{.items[0].metadata.name}'. In multi-pod clusters, target the worker pod matching the node_id or IP address you profiled in the previous step.
Expected output:
-rw-r--r-- 1 ray users 79526813 Jun 2 15:26 /tmp/ray/session_latest/logs/profiles/plugins/profile/2026_06_02_15_26_15/localhost_9999.xplane.pb
The trace directory contains a .xplane.pb file with JAX execution and TPU hardware usage events.
Visualize profiling trace in TensorBoard#
Follow these steps to copy the JAX trace files locally and visualize TPU performance inside the TensorBoard profile dashboard.
Copy the trace folder from the worker pod to your local machine#
Run the following command from your local machine to download the captured profiling traces from the target TPU worker pod:
kubectl cp <TPU_WORKER_POD>:/tmp/ray/session_latest/logs/profiles/ ./tensorboard_logs/ -c ray-worker
Install TensorBoard and the profile plugin#
Install TensorBoard and the profile plugin in your local Python environment:
pip install tensorboard tensorboard-plugin-profile
Start the TensorBoard server#
Point TensorBoard’s log directory parameter to the downloaded folder:
tensorboard --logdir ./tensorboard_logs/
View the dashboard#
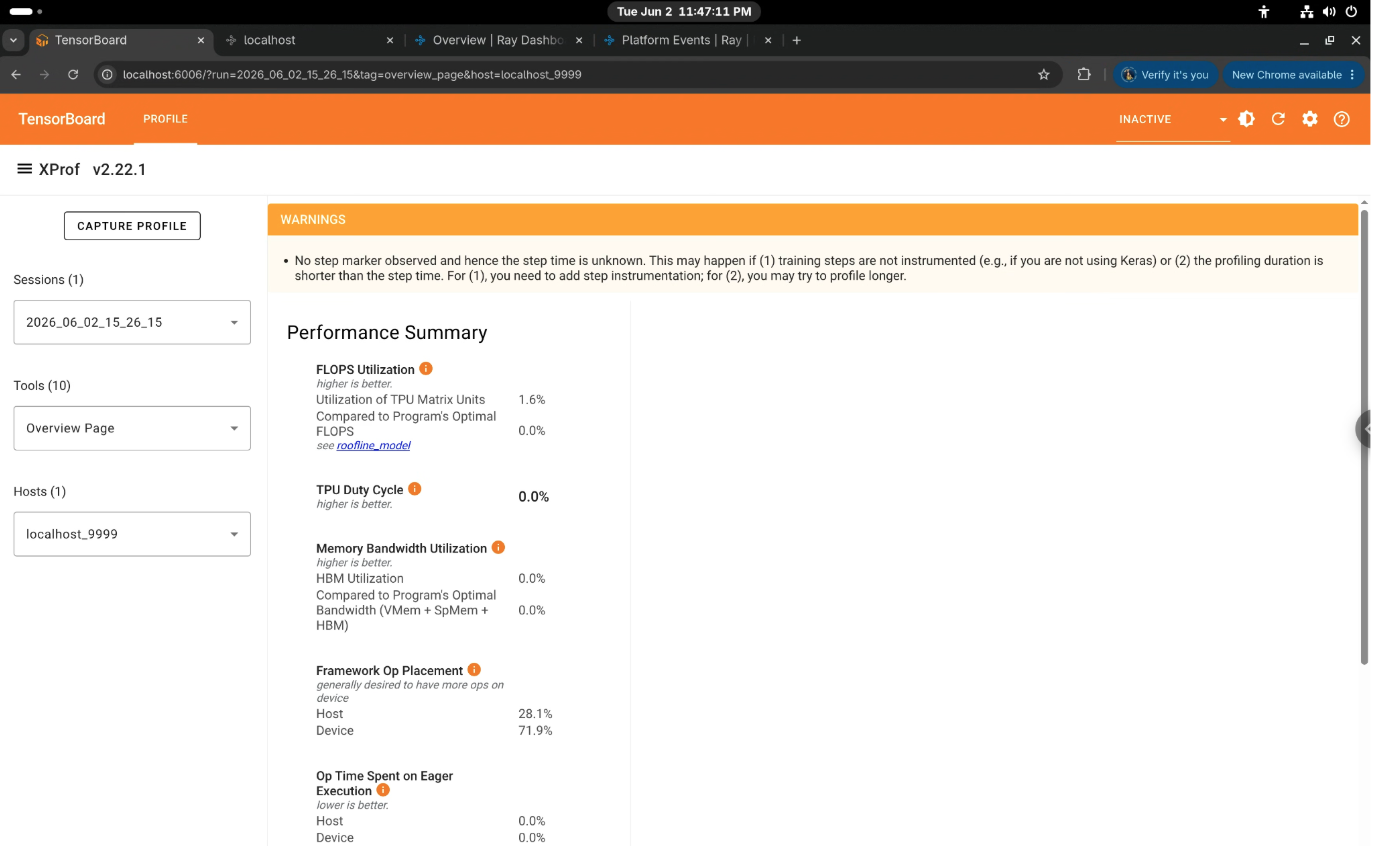
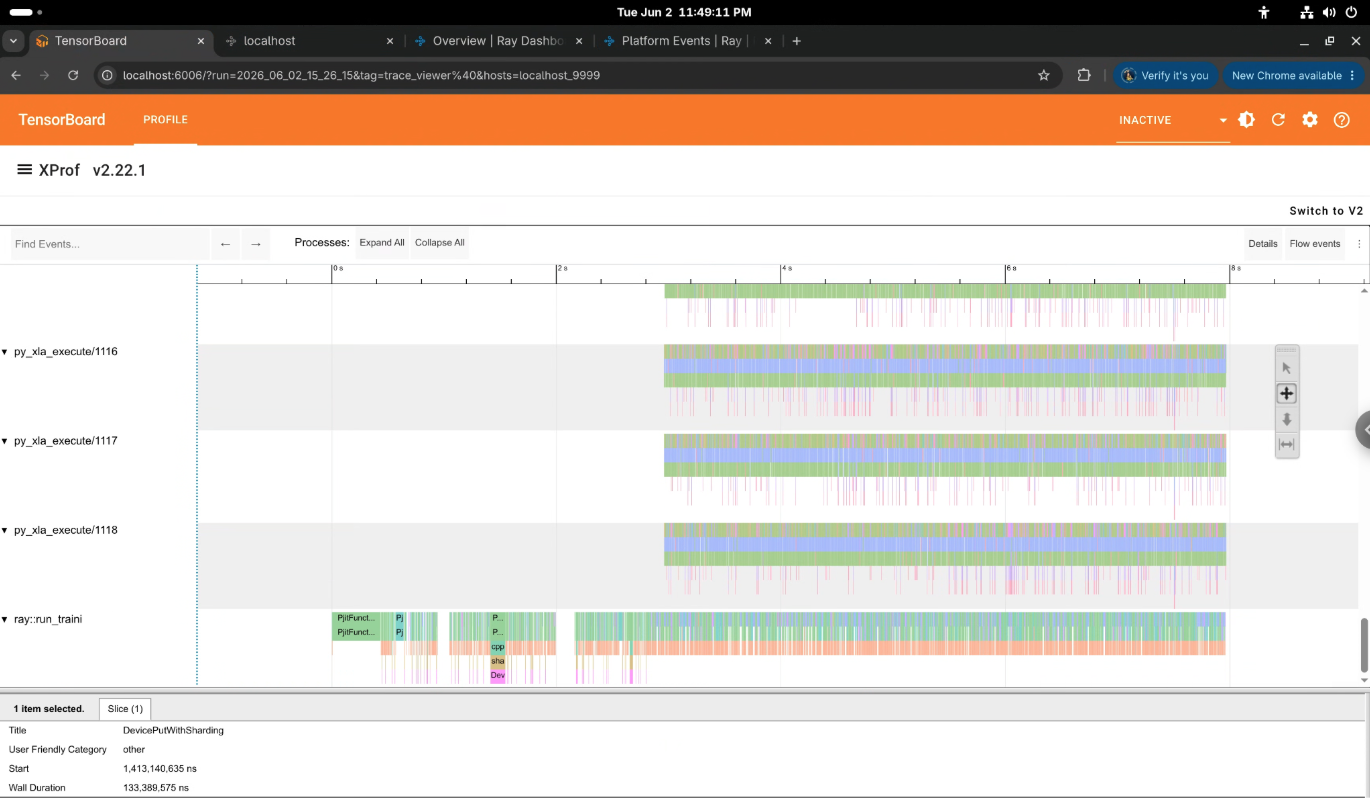
Open your web browser and go to http://localhost:6006/#profile to analyze TPU compilation timelines, operators, and hardware execution metrics.
Sample output: